SQL Server Package (SSIS)
The SQL Server Package (SISS) is used in the Enterprise Version of process.science for Power BI to prepare the data.
Preparing the Input Table
Before you can start with deploying and configuring the SSIS package you should prepare your event log table. The table needs to have the following columns with exactly the name mentioned below.
| Field Name | Description | Data Type | Mandatory |
|---|---|---|---|
case_id | Through this field the process instances can be differentiated. | nvarchar | ✓ |
activity | This field describes the activity that has taken place. | nvarchar | ✓ |
activity_grouped | This field describes the group of the activity that has taken place. | nvarchar | ✗ |
timestamp | This field describes when an event has taken place. | datetime2 | ✓ |
timestamp_end | This field can be used to calculate the duration of activities. | datetime2 | ✗ |
sort_key | This field can be used to adjust the sorting of the event log. | bigint | ✗ |
value | This allows you to set the costs for the current event. | decimal(18,4) | ✗ |
automated | This allows you to set wether the activity was automated or not. | int | ✗ |
Additional Activity Values | Further information per activity, e.g. quantity of items. All fields, not matching other names will be mapped as additional activity values and will be stored in the newly created event log table. | Any | ✗ |
Additional Cases Values | Further information per case, e.g. a company division. All fields starting with case_ will be mapped as additional cases values and will be stored in the newly created cases table. | Any | ✗ |
Additional Activity Values Grouped | Further information per activity group, e.g. quantity of items. All fields ending with _grouped will be mapped as additional activity group values and will be stored in the newly created event log table. | Any | ✗ |
Installation and Configuration
Info
process.science provides a different version of the SSIS Package for each Microsoft SQL Server.
Installing Dependencies
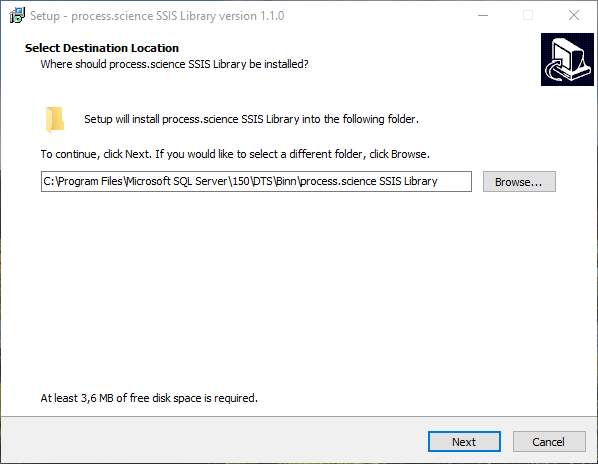
Before you can install and use the process.science SSIS package you need to install the needed dependencies. This can be done by using our provided installer processscienceSSISLibraryInstaller.exe.
Important
This installer needs to be run in Administrator Mode.
You need to select the Binn folder of your SQL Server Instance as the destination location. Normaly this can be found under C:\Program Files\Microsoft SQL Server\150\DTS\Binn, in your case the version number might be different.
Installing the Package
Make sure you installed the Integration Services on your MS SQL Server. Read more on this here: https://docs.microsoft.com/sql/integration-services/install-windows/install-integration-services.
Open the SQL Server Management Studio and log on to the desired server.
Important
You need to log in with an user that uses Integrated Authentication.
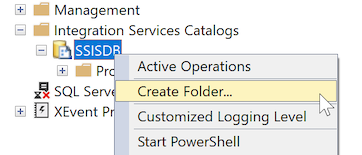
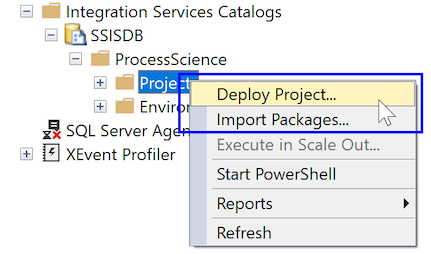
Under Integration Services Catalog → SSISDB in the object explorer create a new folder by right-clicking SSISDB. In this example the folder is named ProcessScience.
Open the newly created folder and right-click on Projects.
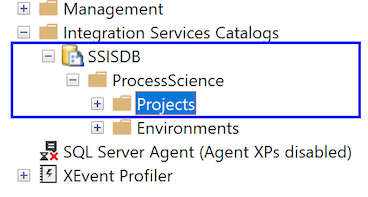
Click on Deploy Project....
On the Introduction dialog of the Integration Services Deployment Dialog select Next at the bottom of the page.
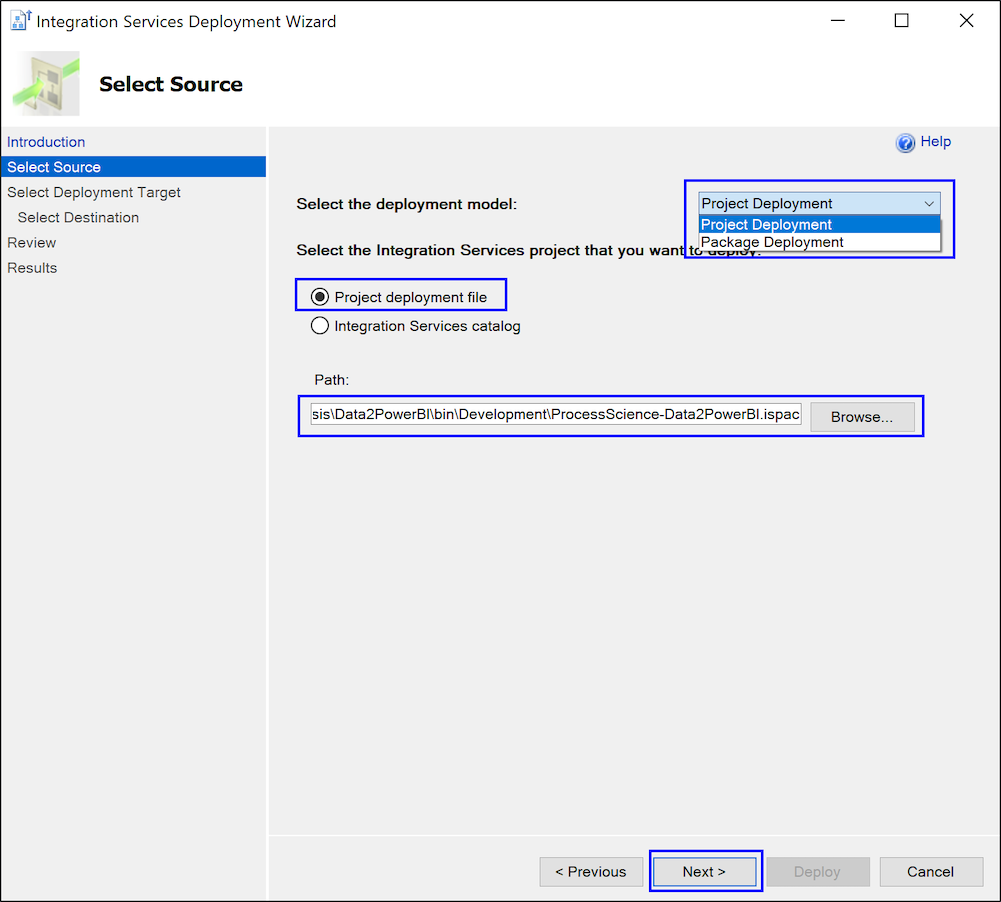
Select Project Deployment on the Select Source Dialog. Select the ProcessScience-Data2PowerBI.ispac-File by clicking on Browse.... Make sure your server has access to this file. In the last step click on Next and wait until the validation has finished.
On the Select Deployment Target Dialog select SSIS in SQL Server and click Next.
Info
You can skip the warning that might be shown.
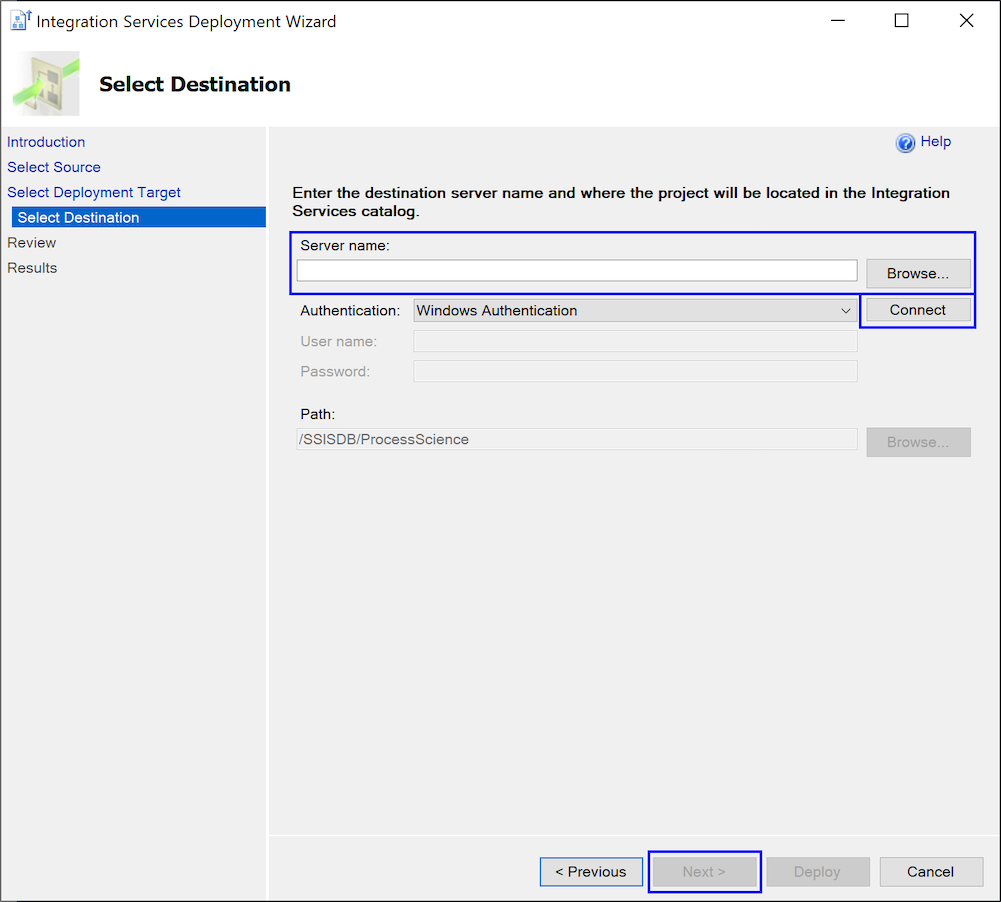
Provide the Server Name and Authentication Parameters and connect to your server by clicking on Connect. Again finish this step by clicking Next.
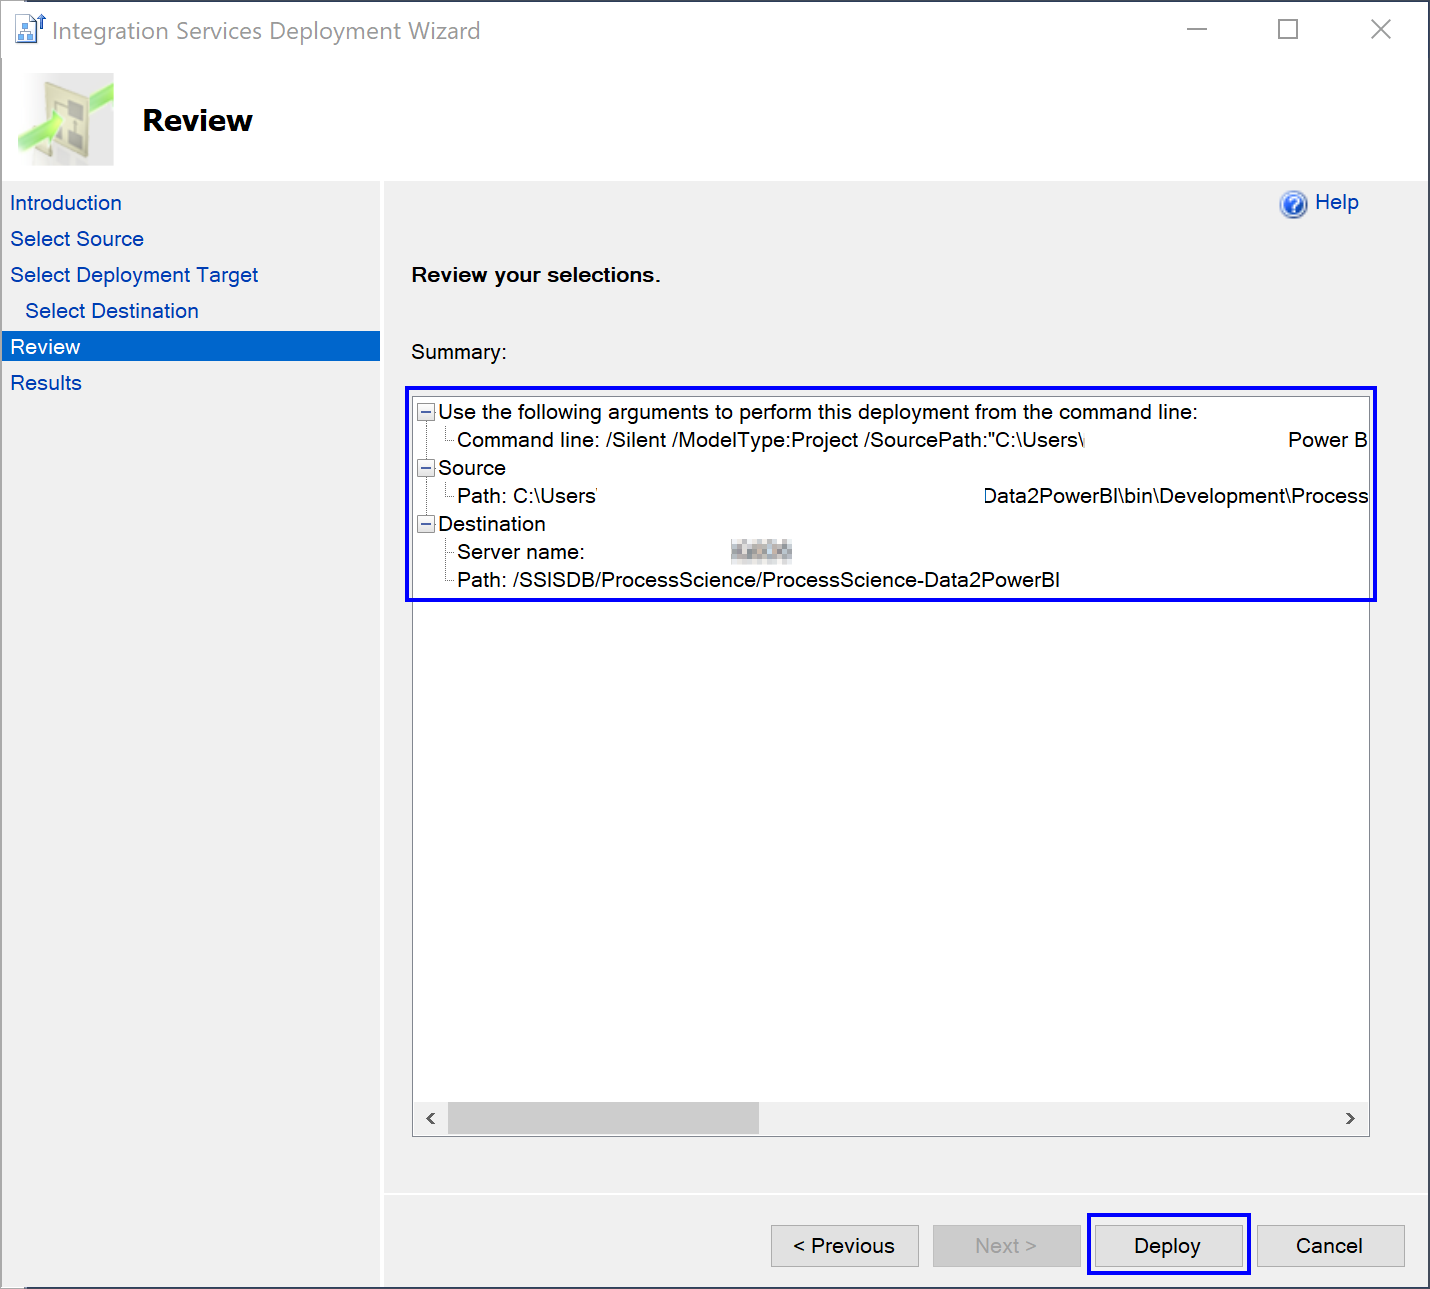
Review the settings and deploy the package by clicking Deploy.
Info
You can skip the warning that might be shown.
Review the results, check that everything succeded and close the dialog by clicking Close. You can save the report by clicking on Save Report....
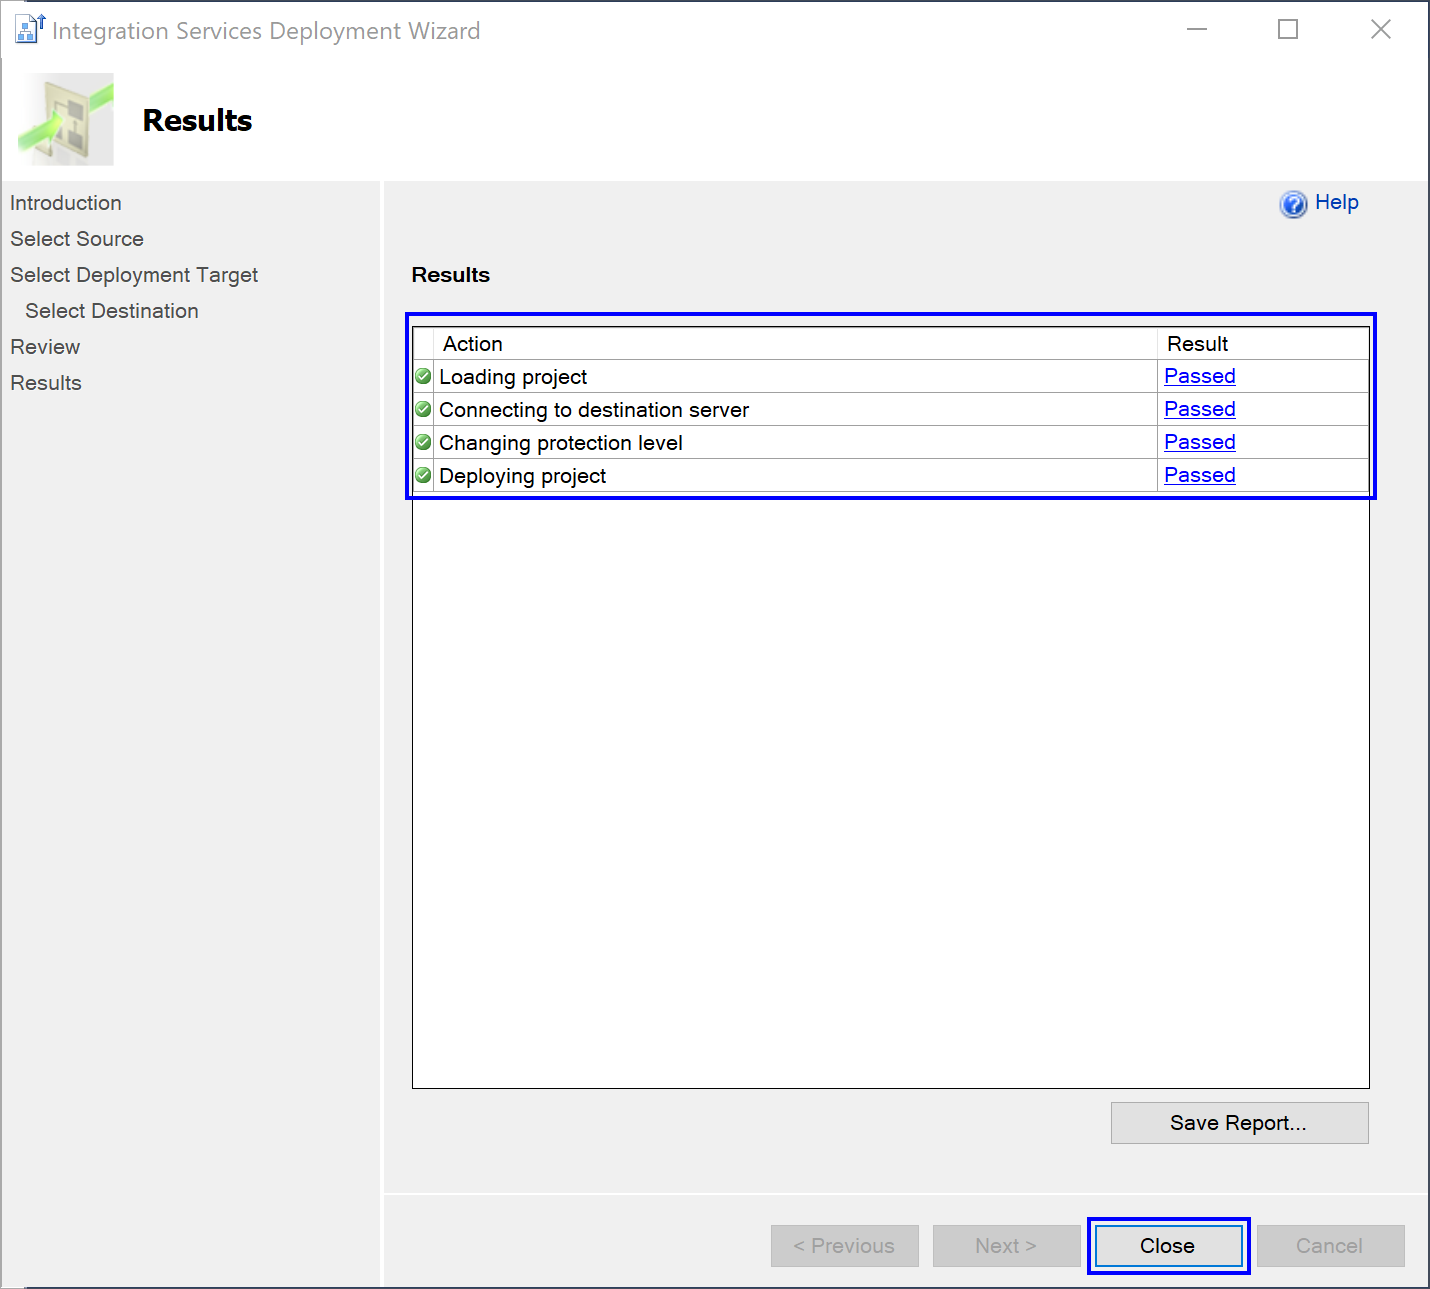
Result
After refreshing the folder should look like this.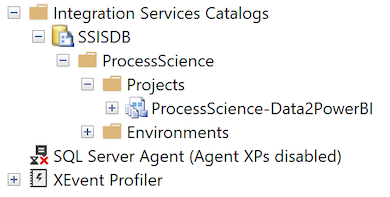
Configuring the Package
Before the process.science SSIS Package can be executed it needs to be configured.
Open the Configuration Dialog by right-clicking the process.science SSIS Package and selecting Configure.
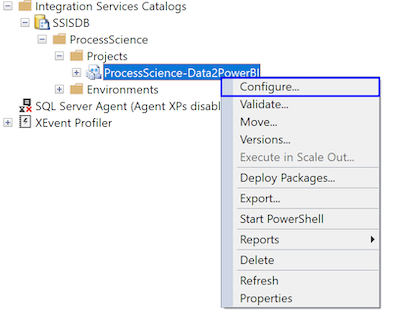
Define the parameters by clicking on the dots at the end of each line.
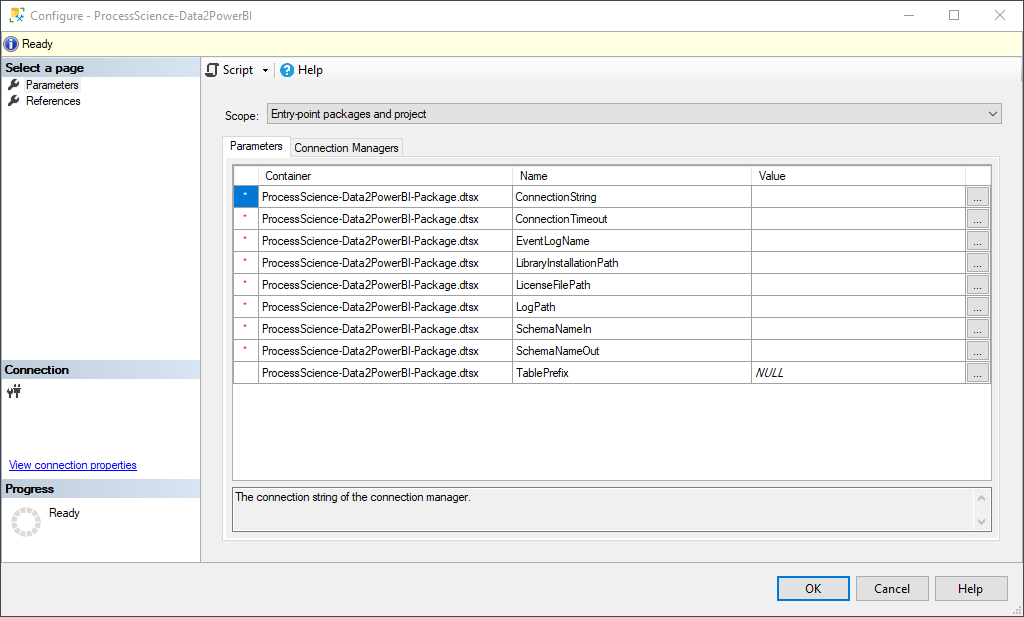
Configuring the parameters
ConnectionStringInput: The connection string for the input table. This parameter is mandatory.ConnectionStringOutput: The connection string for the output tables. This parameter is mandatory.ConnectionStringSqlLog: The connection string. This parameter is optional.ConnectionTimeout: The connection timeout in seconds, set to 0 to have no limit. This parameter is mandatory.EventLogName: The name of the event log table. This parameter is mandatory.LibraryInstallationPath: The path where you installed the library to, excluding the processscienceSSISLibrary.dll file name. This parameter is mandatory.LicenseFilePath: The path to the license file, including the .pslicense file name. This parameter is mandatory.SchemaNameIn: The name of the input schema in which the event log table is stored. This parameter is mandatory.SchemaNameOut: The name of the output schema in which the output files should be stored. This parameter is mandatory.TablePrefix: The prefix of all output tables. This parameter is optional.UseGroupedMode: The flag if you are working with activity groups. This parameter is mandatory.Connect using connection string
The connection string looks like this, for example:
data source=localhost;initial catalogue=processscience;integrated security=True;
Or for SQL logging:Data Source=localhost;Initial Catalogue=processscience;Integrated Security=SSPI;Provider=SQLNCLI11;
Read more on connection strings on this site: https://www.connectionstrings.com/sqlconnection/.Save the configuration by clicking on OK on the bottom of the dialog.
Loading the data
To load the data you need to connect to the instance of your SQL Server containing the Integration Service Catalog and the package created in the previous chapter.
Under Integration Services Catalog → SSISDB in the object explorer expand your newly created folder all the way to the ProcessScience-Data2PowerBI-Package.dtsx. Right click the package and click on Execute...
In the dialog verify all parameters and if necesarry change them by clicking on the dots at the end of each line. Start the execution by clicking on OK.
An information dialog will appear aksing you if you want to see more information about the execution, by clicking Yes a detail view will open. You can allways select no and the execution will run in the background.
Result
Verfify that the SSIS package created the four tables eventlog, cases_data, filter_and and filter_or in you output scheme.
Scheduling
You can set up the SQL Server Agent to schedule the process.science SSIS Package execution. This will allow you to update your data on a regular basis and allways see the latest information in Power BI. Before you can create the actual job you need to create new credentials and a proxy so the Windows credentials will be used.
Create new credentials
Open SQL Server Management Studio (SSMS) as administrator and connect to the instance of the SQL server containing the Integration Services Catalog.
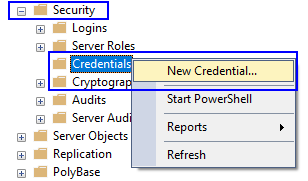
The SQL Server Agent must be executed by a Windows user because windows permissions are needed. Expand the Security node in the Object-Explorer of SQL Server Management Studio to create a Windows user credential and right-click Credentials. Select New Credential.
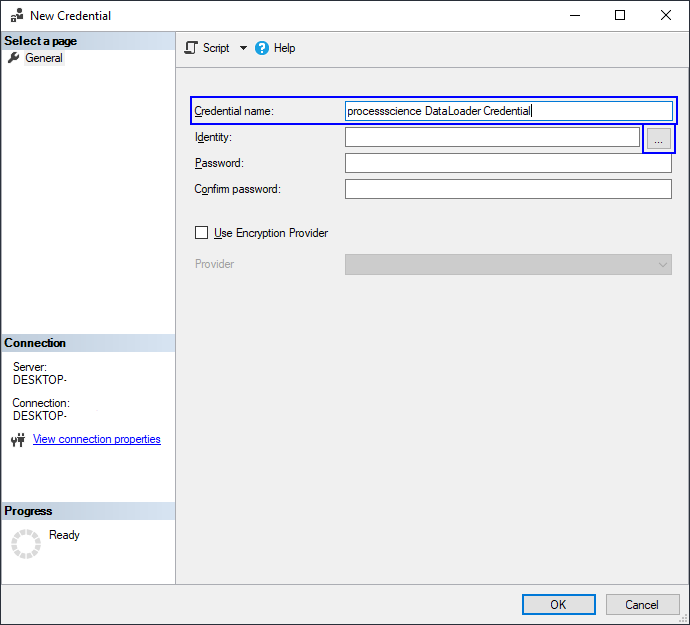
In the input window provide any name as the Credential Name and click the three dots at the end of the Identity row afterwards.
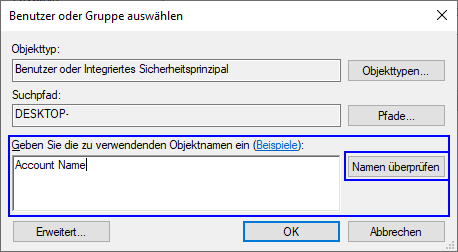
In the new window enter your Windows account under Enter the object name to select and check your input with Check Names and then press OK.
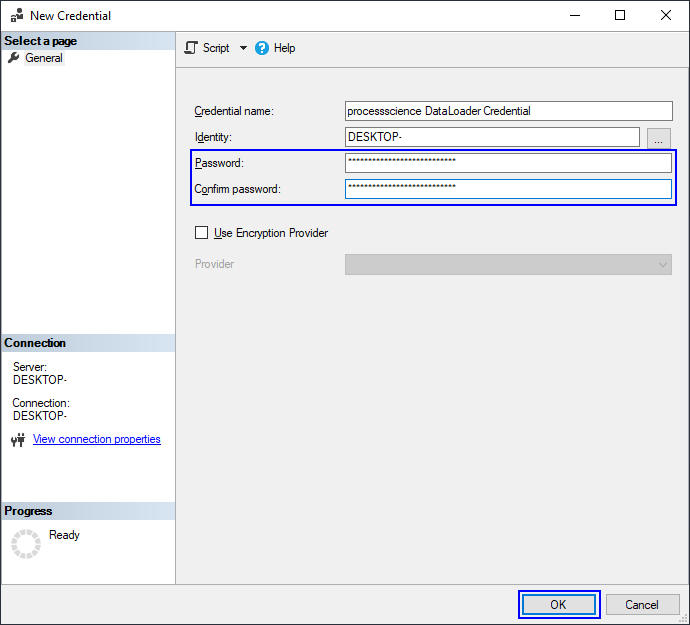
Provide your password, confirm it and close the initial dialog by pressing OK.
Verify Credentials
Verfify your created credentials in the Object-Explorer under the node Security → Credentials. 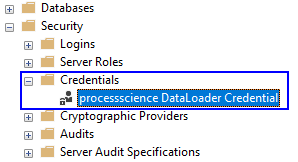
Start the agent
Open SQL Server Management Studio (SSMS) as administrator and connect to the instance of the SQL server containing the Integration Services Catalog.
In order to schedule the process.science SSIS Package you need to activate the SQL Server Agent, already done. Right-click on SQL Server Agent and select Start.
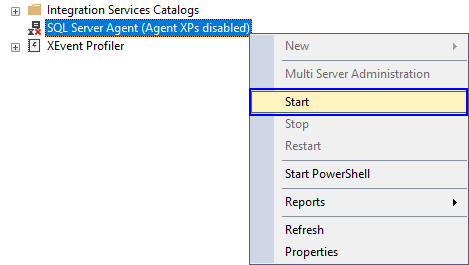
Info
If asked if you want to really start the agent confirm the dialog with yes.
Create a proxy
Open SQL Server Management Studio (SSMS) as administrator and connect to the instance of the SQL server containing the Integration Services Catalog.
Expand the node SQL Server Agent → Proxies in the Object-Explorer of SQL Server Management Studio and right-click on SSIS Package Execution. Select New Proxy.
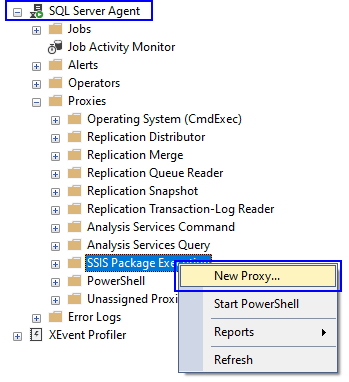
In the input window provide any name as the Proxy name and enter your newly created credentials under Credential name by clicking the three dots.
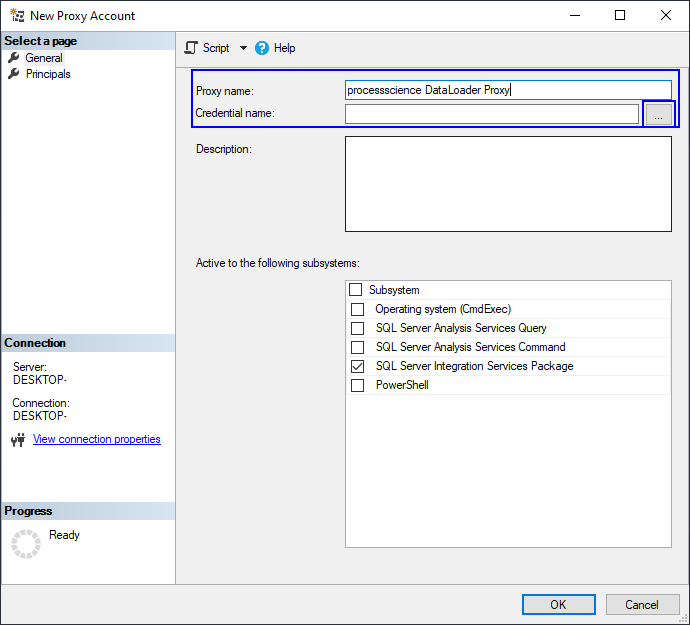
In the new dialog click on Browse to select your newly created credential and click on OK to close the dialog.
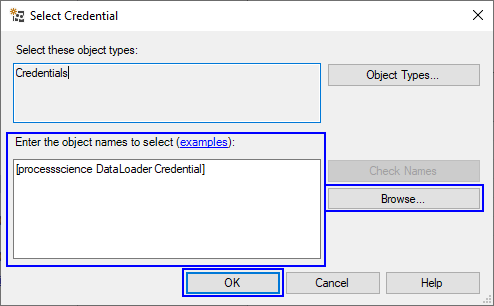
Close the inital dialog by clicking OK in the New Proxy Account dialog.
Verify Proxy
Verfify that your created proxy is in the Object-Explorer under the node SQL Server Agent → Proxies → SSIS Package Execution.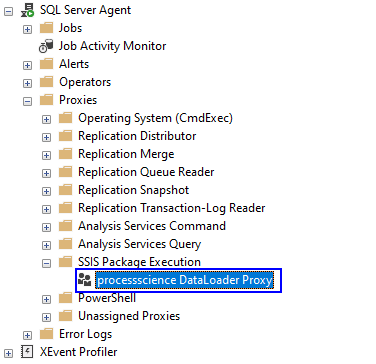
Create the job
Open SQL Server Management Studio (SSMS) as administrator and connect to the instance of the SQL server containing the Integration Services Catalog.
Create a new job under SQL Server Agent → New → Job.
Enter a name for your job, verify the selected owner and create a discription, if necessary.
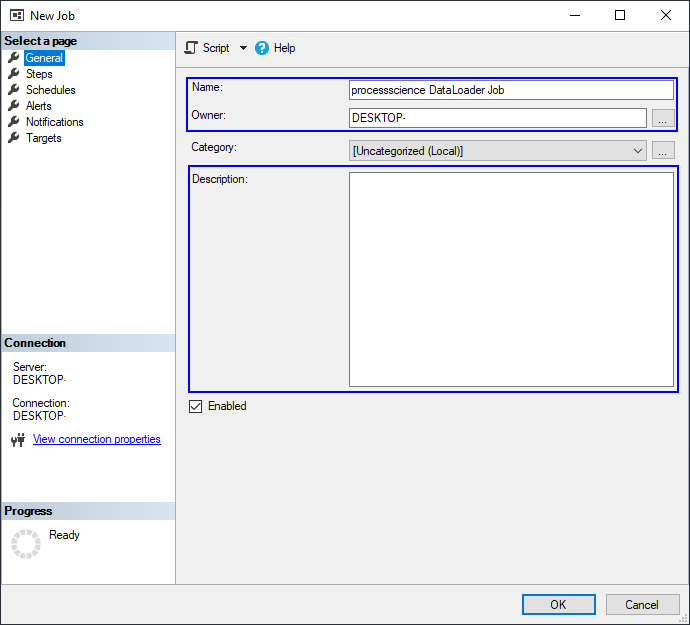
Switch to Steps in the menu on the left and create a new step by clicking on New.
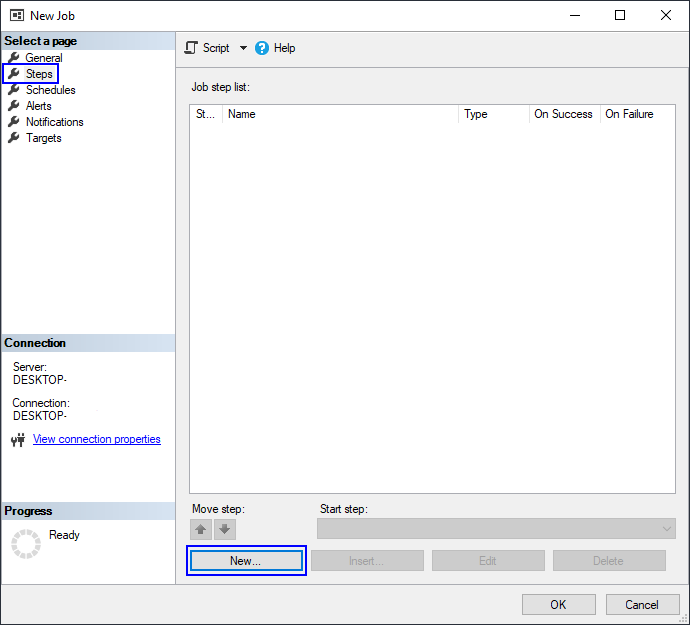
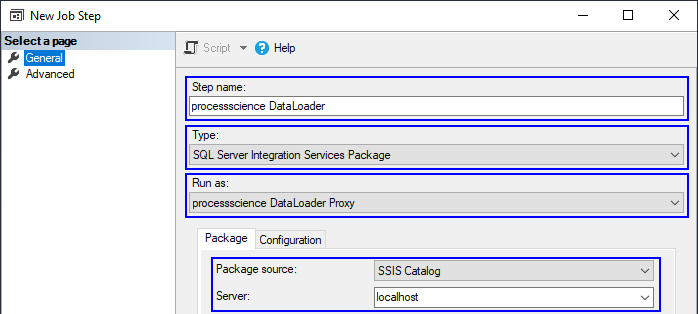
Enter the name for the step, set the Type to SQL Server Integration Service Package, select your new proxy in the Run as and SSIS Catalog in the Package source dropdown. Finally select your server in the Server dropdown.
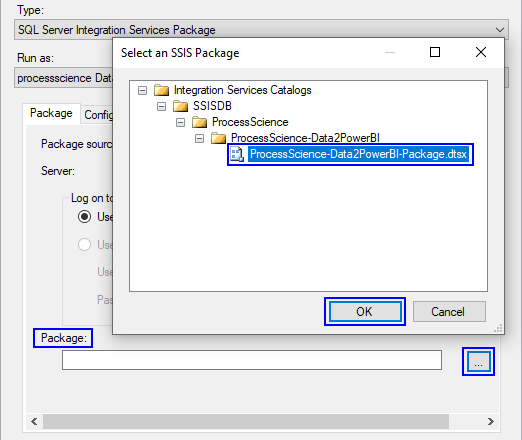
Select the process.science SSIS Package by clicking on the three dots at the end of the Package line and navigating to the package in the file view. Confirm your selection by clicking OK.
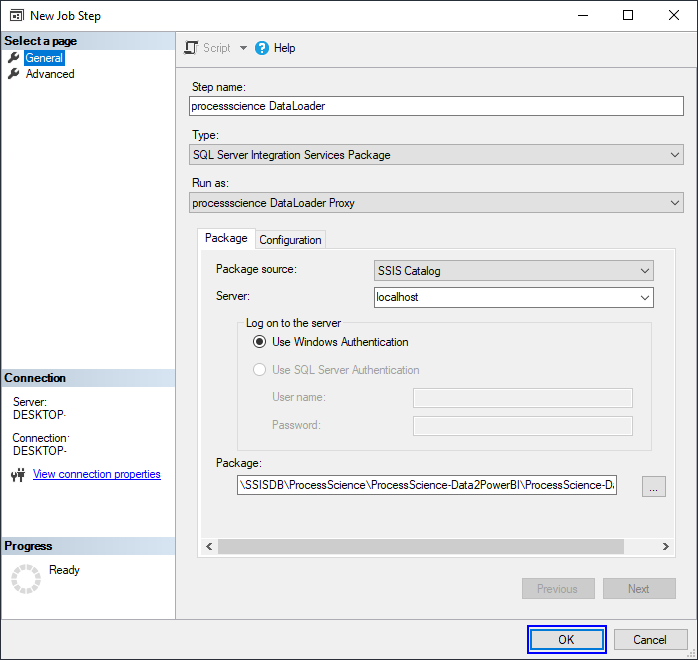
Verify the provided information and save the new step by clicking OK.
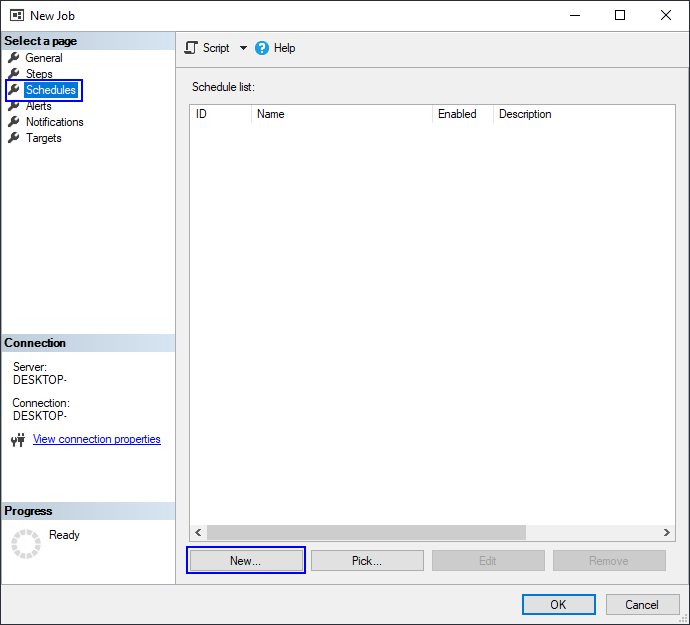
Switch to Schedules in the menu on the left and create a new schedule by clicking on New .
In the new windows you can configure your schedule. Provide a name and define the schedule as you desire. Confirm it by clicking on OK.
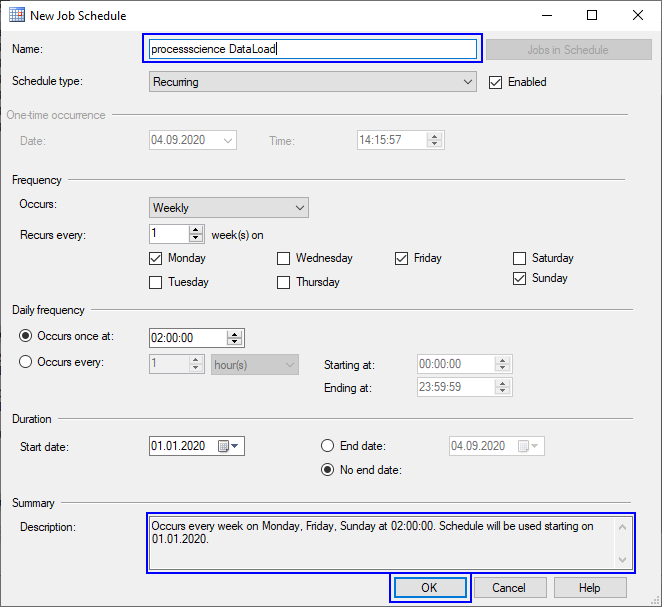
Complete the configuration of the schedule by clicking OK.
Verify Job
Verfify that your created job is in the Object-Explorer under the node SQL Server Agent → Jobs.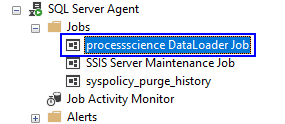
Importing the data
The last step of the data transformation with the ssis package is the import into Power BI. This can easily be done by opening our Enterprise template which is provided within the whole package.
After you have opened the template you need to provide the following the information:
DatabaseName : The name of the database where the process.science tables are located.
DatabaseHost : Hostname of the MS SQL Database where the process.science data is stored.
DatabaseSchema : The schema of the process.science tables as defined in the SchemaNameOut described in Configuring the package.
TablePrefix : The table prefix you defined in the TablePrefix parameter as described in Configuring the package.
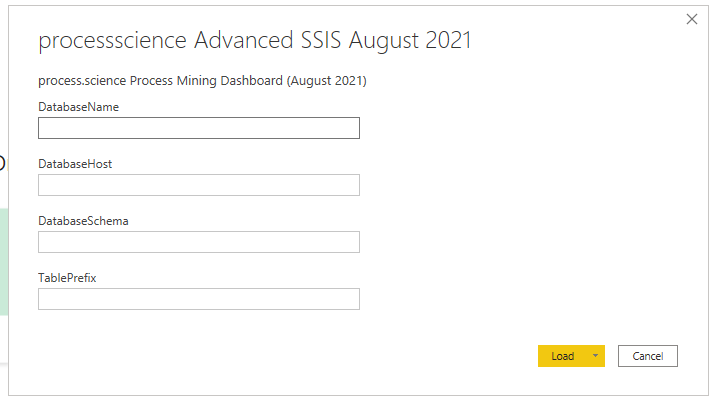
By pressing Load your data will be loaded into the Power BI report, all pre-defined pages and visuals will be shown and you can start analyzing your processes right away.
Important
If this is the first time opening the template file you need to import yout visuals in order for them to work. This is due to the fact that we are integrating the licence into the visual.
Change existing parameters
If you need to change the existing database parameters you can do this as follows.
Open the report where you want to change the parameters.
Click on the Transform Data button in the menu bar of Power BI.

Info
This might look little different in your version of Power BI as this is shown in the June 2020 Version of Power BI.
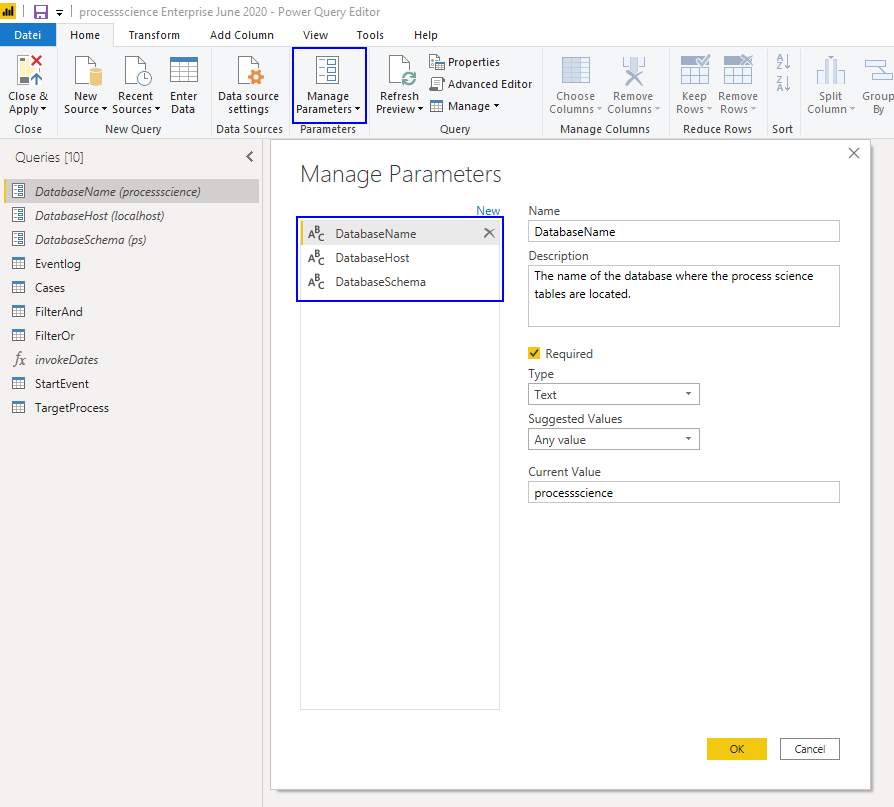
Click on the Manage Parameters button and select the parameter you want to change in the dialog that opened. Confirm the adjustments with OK and reload the data.